Tuesday, December 30, 2014

Biting off more than I can chew - part 4

So close - so close to being finished! Yay!

I put the "gimp" on yesterday. How do you like that for a final vocabulary word for 2014. Gimp is the pretty green stuff on the edging of the furniture to hide the ugly hardware that actually keep the fabric in place. 
 
In my case oodles of staples. This had to be the easiest part of the whole project. You just use a hot glue gun.

I am also just thrilled about how the wood turned out. I ended up spending an extra day stripping, sanding, cleaning, staining, and then oiling it. It's smoother than a baby's butt now and I love how it looks! 

As usual, I had plenty of help. 
  
I'm so grateful Jacques was on hand to make sure the gimp didn't run away, all six yards of it.  

I'm so anxious to get the sofa off of the saw horses and get all of that out of the living room. I just need to put the back on. I bought this fancy stuff that clamps the fabric. Because the back is scalloped I need something that will made a nice edge and help with the installation of the fabric.
This is what was on the back when I started taking it apart. I tracked some down in Fabric Row.  
 
 Now I just need to figure out how it works...

Monday, December 29, 2014

Biting off more than I can chew - part 3


Ta Daaaaah! 
Okay, it's not quite finished. I still need to put the "gimp" around the edges to hide the ugly staples. I need to sew miles and miles of welting so that I can make pillow cases, then I have to sew the pillow cases - and then I have to finish the back. Then... I have to sit on it.
 
I haven't had a chance yet. I am pretty nervous that the fabric (at the edges) is not strong enough to support people weight. Even though I used hundreds of staples.  

I have loads of iPad video - all stuck on the iPad. I still can't figure out how to get it off of there. I need to do this soon though because it is clogging all of the memory. The full extent of work will be shown there. 

I do have stills of some of the in-progress work such as stabilizing the left arm of the couch. It was seriously wobbly. So I followed instructions from the fabulous upholstery book and glued it all back together again. Clamped it overnight. Voilá! All good. 
 

Other than that the couch felt pretty good. The springs were still pretty tight. So I decided against re-stringing them. With Pedro's help we just applied another layer of webbing. I hope I did this right. Unfortunately it is a little bit visible in the front. After putting on the gimp - I'll see what I can do about that.
 
 Over the webbing I put this black stuff - it's feels like a synthetic of some kind, either a soft tyvek, or a pellon or something. Anyway, it's very smooth and I decided I should cover up that nice heavy burlap the cats love to claw so much. I hope it protects it. 
 

Then it was time to flip it back over and start the covering process.  

I had a lot of help:

Jacques made sure the old scraps didn't run off:

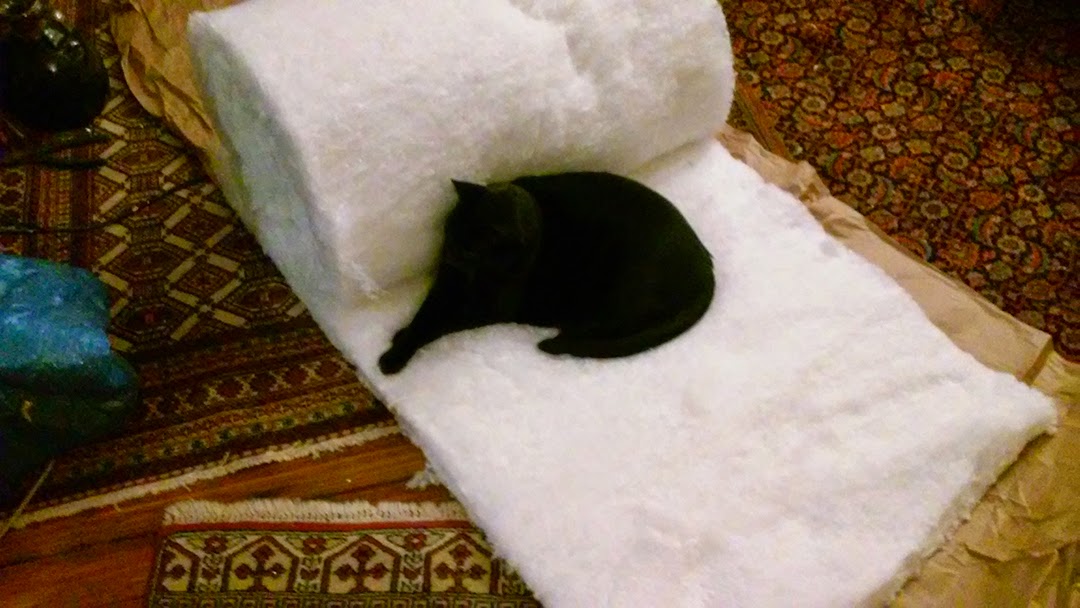
I think his favorite duty was testing the new cotton for softness:
Definitely approved.

 Sometimes the Supervisor/Inspector naps on the job.  

It's almost like they think it's their throne. Jacques didn't waste a minute settling down to enjoy the new fabric.   
 
 Swee'pea has also become acquainted with the new couch.
  
 
Swee'pea and I checked that the size of the old pillows is okay. They still fit so I am going to just take one of these apart and use it as a pattern for new covers. 
  All in all, I think the new couch meets with everyone's approval - so far. As I mentioned at the beginning, I have not sat on it yet. We do know it holds kitties, but I am a little anxious that it might not hold humans. We'll see...

Wednesday, December 24, 2014

Biting off more than I can chew - part 2

Here is where we stand now.  It took a while for me to cave into hauling the "saw-horses" up from the basement. But I must say they have saved my back a bit. All of the fabric has been removed - the white and gold paint has been stripped and removed.  
A beautiful walnut stain has been applied. A polyurethane finish will be applied tomorrow. I ran around today - (yes today!) getting the last bits of upholstery notions needed. I wound up at Katz's Upholstery supply and procured the last of the bits  - cotton (12lbs) burlap (5yrds), webbing (10yrds), and two things I know I need from online videos I found but have no idea what they are called.  
When I started I had this insane notion I'd be able to finish by Christmas (tomorrow!) HA! Right now, I'll be happy if this is finished by the time I return to work in mid-January. But it is fun - I'm excited to see it finished. 

The kitties have been most helpful and are excellent inspectors: 
 Here Swee'pea holds down that rogue fabric.

Jacques inspects the almost bare frame:

And of course the boys had to help while the work was happening. 
I am sorry that parts of this video are so boring. The cats show up at about the 45 second marker.  I cannot seem to import the videos from my iPad into iMovie in order to edit. I'm not sure what the problem is. Also all of the people who could help are on vacation (like I am!) so at some point I may be able to edit all of these crazy videos. I am actually documenting most of what I'm doing.  Maybe I can put together a "full length" feature (of the good stuff) of my adventure. Should make about a 5minute film.

In the meantime - happy Christmas everyone!

xo

Monday, December 22, 2014

Biting off more than I can chew

Yes. I am. AND - I know it. But I'm doing it anyway. 

Here's the deal - my couch needs a facelift.


I bought this wonderful couch when I came to Philadelphia more than 11 years ago. It has served me well. It is very comfortable and used to be quite lovely. Although I had misgivings about purchasing a white couch I did it anyway. 
I finally started thinking seriously about this need this summer when the fabric on the bottom split wide open.  
My Aunt Lois gave me a wonderful upholstery book that I have been studying. I can also hear her voice along with my Aunt Alice about how difficult and time consuming couches are. But I am throwing caution to the wind... If I manage this - all other projects will be a piece of cake.  

Also this past fall I had wonderful interns. One of them introduced me to a time lapse app. I am thrilled to be able to share my Charlie Chaplinesque adventures. 

Monday, November 3, 2014

Headbands

Fall/Pre-winter has arrived. It was a cold, rainy, and windy weekend here in the Philadelphia area. 
Over the last few weeks I've been preparing myself for this.
I've been picking the last of the tomatoes green and red. The last batch of Melisse pesto was made.
The last and tallest sunflowers have bloomed and are about finished. Here they are peaking up over the top of the first floor roof.
 
It is lovely to see them in the morning. The bright yellow is so happy. 
The last bouquet of sunflowers for the kitchen was picked,  
 
and inspected.  

The cool weather also makes me want to get into the kitchen. 
 
I discovered this amazing recipe for Cauliflower Cake. Delicious! 
   
After all of my chores were finished, I decided to do something I've been wanting to do for a while, sit down with my book, Headbands: How to Work Them, and try to make them all. While I'm not particularly interested in the first few - I decided - if I'm going to do this, I'm going to do it right. I'm going to do all of them. 
 
For the first one, the bead is on the front of the headband, towards the foredge of the book. 

My workspace. I made a very small text block, only one sewing station.  These are the off cuts of another book. Really I just need the spine to be wide enough to get some good practice on the headband. The rest of the book is irrelevant (so far).  

 Start.
Half way.

Inspection:
 

Completed front: 

Completed back:
Conclusion: I learned this headband from Daniel Kelm some years ago and I think I like his method better. He sews from the spine edge which makes managing the threads a lot easier. But trying to stick with my resolution to do it as the book says, I managed, and I think it is okay. The other conclusion is - I am going to use the technique of gluing the core to the text block. I learned that trick from Don Rash many many years ago and it's the only one that makes sense. There is no point in trying to fiddle with something flapping around when it can just as easily be pasted down. I think it will also help with shaping. Currently, with no covering, the headband is very hard to shape as it has no support.
It will be a while before the next one. I need to make the text blocks first.

Tuesday, October 14, 2014

More Fall....

I took so many beautiful images of fall up in the Berkshires.  I just wanted to share them with you.
The tree I parked under at Melanie's. 

We went for a quick afternoon hike to see the color across the valley from Melanie's house. 
leaves on the ground
and in the air
 
 And the view of the valley.

Sunday we hiked to the summit of Mount Greylock. It was a gorgeous day and many many people took advantage of the beautiful weather. 
 Including us.
When we came off the mountain Melanie and Doug got into their 63°F pool! I dipped my toes in. 
And before I knew it I had to head home and leave this fall idyll.