Monday, February 29, 2016

Better late than never

Finally this past week, I made my 2016 Calendar and Day Planner.
Originally I wanted to use the leather bound mock up I'd made for a different project:
But figuring out how exactly to do that was baffling me.  The mock up was just to see how the boards would attach and so I didn't pare the leather the way I should have and I just couldn't get past that.
I wanted to use the case in the same way I've been making my magic travel journals:
 The elastic holds everything in place - but if you want the case to have the raised cords, well... you have to do some internal engineering that I just wasn't interested in spending the time on.
So while my students were making a regular case bound book - I used the inbetween-demonstration-time to work out a longstitch pattern.
 
It didn't quite work out the way I had intended but I'm actually happier with it. 
 
I used two different color threads and sewed them in two different directions - one across the spine, the other along the spine.  
And now, I am able to schedule all kinds of thing!  Ooooeeee! Watch out everybody. :) 
 
 Okay - time to confess - I finished this project last week.
This weekend I was occupied with all things letterpress.

On Thursday an intrepid former student asked to come learn to print letterpress so that she could print her business cards for her thesis exhibition. Well she is a fabulous, self-reliant, student so of course I said yes.

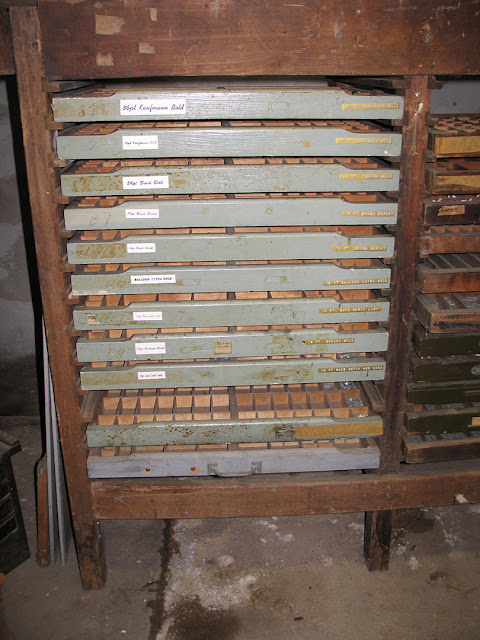
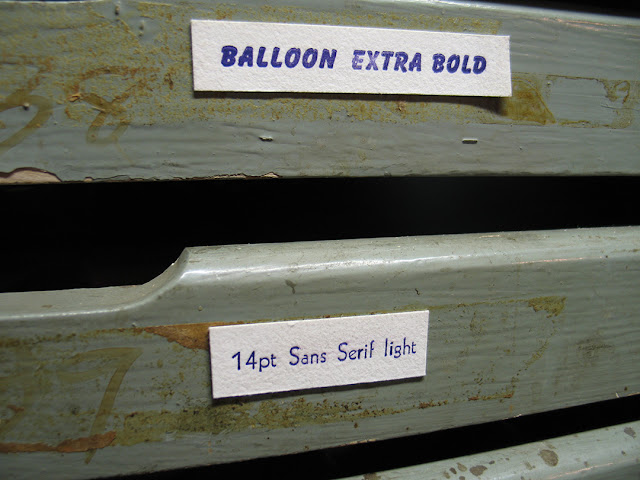
While she was printing and rounding corners, I was catching the printing bug myself. I had several drawers of type, already sorted, that needed better labeling. So I set type from the drawer with the name of the font (when I knew what it was) and the point size. 

 
I printed it and was able to label almost two dozen drawers this weekend! 
I was so excited about the results I binge-watched Game of Thrones, Seasons 3 - 5 (Thank you Free Library!) and sorted about six more drawers and printed them. I've got some great fonts to work with and I can't wait to finish them all now.  
A lot of them are an absolute mess:

For some drawers it was easiest to stack everything into the job stick, vacuum the drawer of all the dust, and then redistribute the whole lot.

For others it was simpler to dumped the whole mess on the table and start from the beginning.
 The Supervisor came and checked on things periodically. But it was so cold on Friday he was content to be glued to the heating vents. 
 Or sunbeams when nature provided.
 Printing was fun. I learned a lot about my little press that will help when Sarah comes to print her business cards (part 2).
And today my new purchase came in the mail!
Can you tell what that is?
That is the @ symbol as lead type! yippee!  Most (actually I think almost no) type faces didn't include this symbol, which makes setting business cards with an email address a little difficult. I am now the proud owner of @s sizes 5pt - 12pt. I can't wait! I think I might need to set my own new cards. :)

The Jr. Supervisor wasn't as excited as I was: balancing on the banister was more his speed.


Sunday, February 21, 2016

The best DIY gift ever

 Melanie always sends a box of amazing goodies for the holidays. This year a little baggy came with soap, salve, and a spool of Belgian linen - to knit your own back scrubby! Instructions included courtesy of Lyric Hill Farm.

It knitted very quickly - and I must say this the perfect gift for a knitter. Because of course, I wasn't going to use the soap or salve until I had fulfilled the obligatory completion of the project. So everything else was set aside so I could whip this little ditty up.
There is plenty of linen left - so watch out everybody...

Monday, February 15, 2016

An actual home improvement

Happy belated Valentine's Day! We had fun at work this week making different decorative hearts including this one. I found a wonderful Danish website that is dedicated to all things paper weaving. Papermatrix.dk can get you through every holiday imaginable with their inventive designs. 

This weekend I thought I would do an actual home improvement for a change. A while back the water pressure in my kitchen faucet dropped. When I finally had to call the plumber for something else, I asked about this. He said that sometimes debris can shoot up the pipes and sort of clog the faucet. But unfortunately with the cheap faucet I had, there wasn't much he could do. If I had a more expensive faucet he could take it apart clean it out and it would probably take care of the problem. I thought about this for a few weeks. Then on my next visit to Home Depot I perused the faucet section. I found one I like that was one of the "good" brands the plumber had mentioned and I found a reasonably priced one and bought it.
Then it sat in my kitchen for a few months. 
This weekend seemed like the perfect weekend to take care of this since it was a holiday weekend. That way if anything went wrong I could pay twice as much to have someone come fix it.  
 
The old faucet. In addition to the low water pressure, the side hose didn't really work anymore either. It would spray but the faucet would still run even though it was supposed to shut off.  

The thing that was probably the real motivator was the condition of the cabinet under the sink. I had put the contact paper in when I moved it (8years ago). Time for a good cleaning. 
 
Now, if you are impressed that I installed my own faucet - don't be. It's pretty easy. It comes with great instructions and all the parts you need. 
The challenge is taking the old faucet off. 
Oy vey! 
It is rusted, and stuck, and you have to crawl under the sink in the weirdest position, then try to get the stupid plastic (broken) gaskets off. Meanwhile all of the rust is falling into your eyes and the hoses aren't quite empty even though you turned the water off so they drip on you and then you have to put your head down for a second to rest and you put it right in the puddle of water... 
Still the gaskets won't come loose and you can't bang on them because there's no room in there and you are scared to push at things to hard because you don't want to slip and cut your fingers... 
Finally, WD40 to the rescue! But you have to spray that twice to get it to work and then you have to let the cabinet air out because you can't breath with the WD40 fumes under there. 
But finally - you get the darn thing off.  


It took me over two hours to get the old faucet off and about 15 minutes to put the new one in. 
 And it works beautifully! There is no dripping under the sink - I've check a few times - and the side hose squirts fabulously and shuts the actual faucet off!

And under the sink? Much better.

As you might have heard we had absolutely frigid weather this weekend. It was unbelievably cold. Today it warmed up and started to snow. It was the kind of snow where we get "real" snowflakes. Sadly my camera is not great at the super close ups - someday I'll have on that is. Here are the best ones:

Sunday, February 7, 2016

Feed Your Soul

Last week I received a beautiful box of limes from Uncle Ralph. Yes, those really are limes even though they are very yellow. And they are the best limes on the planet. Maybe these are what made me want to cook so badly this weekend, in spite of having several other more important things to do.
 
 There is nothing I enjoy so much as going into my beautiful kitchen on a weekend afternoon and creating something delicious. 
What will I do with the beautiful limes? I have a lot of plans.
First of all one would be put into my favorite soup.  This is a recipe I created based on things I like. It is a chicken dumpling soup with cabbage, cilantro, lime, garlic and ginger. 
Ingredients part 1:
1 pint home made veggie stock
any diced veggies you'd like to add that need cooking - carrots, turnips, etc. 
1T soy sauce
1T spicy Korean sauce
chicken dumplings from Chinatown
 Put all into a pot and bring to a boil, when boiling add the dumplings and cook until done. Meanwhile:
Ingredients part 2:
cabbage (napa, regular, or red)
cilantro
ginger
garlic
lime
 
In a large bowl shred the cabbage very fine (about 1/2 cup) add the cilantro leaves as many as you like. Using a fine grater, grate one clove of garlic over this, and some fresh ginger. Add the juice of a lime.   
When the dumplings are cooked through, pour the whole thing over the raw veggies. 
 Allow to cool a little before eating. This is always too much for one meal, so you can take the left overs to work for lunch tomorrow.  

It was also time for home made veggie stock. 
 
I make mine from all of the left over cuttings from the vegetables I use for a month or two. I just put them in a Ziploc bag in the freezer. When I have three or four full bags it's time to take down the big copper cauldron and brew up a batch. 
 It is a bit of a stinky affair, but well worth it.
I usually get 8 - 9 pints. And I can them in my grandmother's giant canning pot.

One of the most wonderful things about having two kitchens is I can do the really messy stuff down stairs. Canning in such a big pot produces a ton of steam. And it is much easier to fill with the garden hose anyway.  

I use this stock in a lot of my cooking. Tonight I wanted to make a pumpkin baked zitti, but I didn't get to the baked part because I was too hungry. Long story short, the pumpkin I roasted on Friday was very dense. I added a little stock and some tomatoes and voilá! a nice thick sauce. 

This afternoon I spent some time making my new favorite vintage recipe: Cup Ginger Cake.
 A few weeks ago the archivist at work brought me something new to conserve (new to me). It is a cookbook dating back to at least 1867. It is another handwritten manuscript receipt book and it's full of fun deserts. I have refrained from engrossing myself in it - way too much to do! But I have browsed a few times. One recipe kept nagging me after I'd read it:  Cup Ginger Cake. I think mostly because of the odd title. The recipe is:
Take 3 teacups full flour, 1 sugar, 1 molasses, 1 sour cream, 2 eggs,  piece of butter, 1 tablespoon each soda and ginger and a few cloves ground. 
Okay - well now the "cup" thing makes sense right? 
 Great-Grandmother's teacup.
The necessary ingredients:
 I basically mixed everything together in one bowl. I did mix the dry ingredients together first and beat the eggs before adding them. But maybe next time I will mix the dry ingredients and then the wet in a separate bowl before combining them. I baked it all at 350°F for 35 minutes. It is a little dryer in the bunt pan than when I made it in a 5x8" pan. So that is something else to consider. But it is still very yummy.
 A new favorite for sure. Happy cooking everyone!